Well hello there, blog reader. Its been a while.
Here's the deal: I've been in a funk lately. I just haven't felt like myself for quite a while now. Spiritually, physically, emotionally, and creatively. The best word I can find to sum up how I've been feeling is:
BLAH. I know, I should get a thesaurus or something.
I completely acknowledge that this is how life goes. That sometimes I feel totally inspired, on my game, and ready to take on the world. And other times I am always tired, not feeling "it" (whatever "it" may be), and I just want to curl up on the couch and watch episodes of Glee. Over and over.
Thankfully I've been able to finally admit that I've been in a funk and have started making little changes here and there. Exercising again, carving out time for some quiet time with God, MAKING myself MAKE STUFF with my hands, etc. And, surprisingly I'm slowly starting to feel like myself again.
One of my cousins asked me to email her some examples of some of my scrapbook layouts. So I decided that this would be a great opportunity to go through our scrapbook albums and pull out my all-time favorite layouts. I was going to try to only pick ten. I think I finally narrowed it down to 20-something...and THEN I realized that looking through all my scrapbook layouts really INSPIRED me to go create. It was a great little way to get back on the crafty bandwagon.
While looking through years of scrapbook pages, I made a list of things that kept coming back up over and over again:
1. I tend to use mostly neutral (beige, white, browns, and blacks) background colors.
2. I really like using circles as design elements.
3. I like my own handwriting. But even if I didn't, I would still hand write my journaling.
4. Almost all of my favorite layouts are about everyday stories and not events (birthdays, holidays, etc).
5. I like incorporating paint.
6. Grids are my scrapbooking friend.
7. I LOVE using just one photo on a layout to tell the story.
8. I also love using many photos from more than one scene/day to tell a story.
9. I made lots of mistakes on my pages and just went with it anyway.
10. My family is pretty rockin'. We've done a lot of living over these past few years. It is an honor to create art from the memories we have made. I'm SO glad I get to scrapbook!
With that being said, here are my all time favorite scrapbook layouts. I took a photo of each layout, so some images may seem slightly blurry. You can click on each image to see the layout larger.
"family"
Why I love it: Mostly because of the awesome photography by my cousin Jamie (Photography by Jamie). And all the black negative space. And the painted white edges. Ohhhhh I love me some paint on a layout. I love that this layout doesn't necessarily tell a specific story, its all just cool photos.
"capture life, create art"
Why I love it: Because THIS is my creative mantra. Capture Life, Create Art. I have this layout hanging in my scrapbook room STILL, even though it was created in 2007.
"the technique"
Why I love it: This layout was super quick and simple and tells the story about how my daughter Macy would scoot all her food to the edge of her high chair tray and suck it up in her mouth. Macy is now almost 4 years old and I'm certain this is a story I would have forgotten by now if I had not scrapbooked it. I love the simple design of this layout.
"almost 3"
Why I love it: This 2-page layout has nine photos on it that are all from different days during this season of my daughter Macy's life. This layout captures a short time span in Macy's life. I love that there is a photo of her crying and a photo of her crossing her arms when she didn't get her way. Lots of paint. I did the journaling in list form on the side and it includes snippets of Macy's personality at this stage in her life.
"love you"
Why I love it: This is one of my favorite photos of me and Macy. Although I tend to reach for neutral background colors for most of my layouts, teal is one of my favorite colors right now. I LOVE the color combo on this page.
"4 month old"
Why I love it: Oh my, what a cute smile. This is Macy at 4 months old. (The reason this image looks like there is a reflection over her face is because there is a photo overlay on top of the photo.) I love the design and colors and the tight journaling around the photo block.
"messy eater"
Why I love it: This is my daughter Zoe a few months ago. Man alive, she is the messiest eater of all three of our kids. I just wanted to remember that about her as a baby. Love the colors and messy design.
"sweet Zoe girl"
Why I love it: This is Zoe at 10 months. I just jotted down a few things I wanted to remember about her at this age. I LOVE the white background with red and pink accents. And I super love the white letters on top of white paper.
"travel bug"
Why I love it: This is a great example of using a grid as a design element. I do this often. I love that there are 10 photos on this layout, and they all capture Zoe's essence at this stage in her life, which included a trip to visit my dad in Arizona. Cropping photos to a fit on a grid layout is super fast and simple and looks great! I like the papers and the list-style journaling on the left side of the 2-page layout.
"5 months"
Why I love it: I love the title and butterfly on the negative space of the enlarged photo. I LOVE that big photo of Zoe.
"first bites"
Why I love it: I love that this layout shows the story of Zoe's first few bites of real food. Such a fun, although messy, experience. Love the super simple and easy layout design.
"tired"
Why I love it: This is one of my favorite photos of Zoe as a baby. Matt was holding her on the couch and they both fell asleep (oh the joys of a newborn!). And good ol' Conan (our old dog!) was right there in the baby action. I absolutely love this color combo and the placement of the long journaling.
"Zoe"
Why I love it: I love the white background and the mixture of black/white photos + color photos. I LOVE these photos of Zoe as a soft squishy newborn. Love the soft pink accents.
"barely 5, almost 2"
Why I love it: This might be my all-time favorite layout. I love that it includes TONS of information about Jack and Macy (this was right before Zoe was born) and a bunch of messy design elements. Stamps and paint. Yum!
"first smile"
Why I love it: Because this was literally Macy's first REAL smile as a baby and we just happened to have a camera ready at that moment! Special. Love the patterned papers and love the dotted border around the photo.
"hey, I'm 5"
Why I love it: Special photos taken throughout the entire day of Jackson's 5th birthday. Love the design of this page and all the journaling along the side of the page.
"merry and bright"
Why I love it: Again, loving the white background! Another example of using a grid as a design element. Lots of photos (12!) on this 2-page layout from an entire Christmas season. Lots of fun journaling about Christmas. I like the white letters on a white background.
"super Dad"
Why I love it: That top right photo is one of my favorite photos of Matt with our kids. Right after Zoe was born, they were all chillin' on the couch watching football. So sweet to me. The journaling on this layout is special to me as well.
"fall '09"
Why I love it: Another example of using a grid as a design element! I love all the white paint on this black background. And I LOOOOVE Fall photos.
"these hands"
Why I love it: Love the story this layout tells. I remember looking through a bunch of photos and noticing how many photos there were of Jackson using his hands. I'm so glad I made a layout about this! I love the photo placement of this 2-page layout.
"j"
Why I love it: This is a very special photo + story for me. Jackson is our first born. The day before our second child was born, I took Jack on a little photo shoot in our neighborhood (lots of construction and tractors) and this was my favorite photo. The journaling is written to him and it is all about how special he is to me and how our lives were about to drastically change the next day when he would have a new baby sibling. I just wanted him to know how special he was to me even though these next few months would be hard on Mama with a newborn! And I love the color combo.
"sit still and smile"
Why I love it: Again, I love the STORY this layout tells....about how hard it is to get a good photo out of your kids when they are squirrely and won't sit still! I love that I incorporated blurry and not perfect photos to tell this story.
"4"
Why I love it: Love the design of this layout and photo placement. LOVE that photo of Jack holding a red #4. Love the circles and squiggly journaling lines.
"10.4.08"
Why I love it: I LOVE this layout concept...."the story of today". The journaling is detailed snippets of what we did throughout that specific day. I do this a lot and love documenting the tiny little insignificant details of our regular day. Love that photo of Macy coloring.
So, there you have it! I'm definitely more inspired now that I've taken the time to go through all our scrapbooks and catch a glimpse of our lives. Love the hobby of scrapbooking.
Showing posts with label scrapbooking. Show all posts
Tuesday, June 28, 2011
Monday, March 21, 2011
Project Life update
Project Life is coming along nicely for me. I've been adding in extra stuff some weeks and other weeks I'm just including photos + journaling. I love the flexibility to be able to add in extra life stuff! I also love the flexibility to not worry about having to take a photo each day. Some days I just don't. Or I forget. My weekly layouts are more of a "weekly glance" at our regular life. I'm not stressing out about having to take a photo each day. As long as the weekly layout sums up what happened throughout the week, then I'm good.
For this particular week in February, I added a few extra things to the regular weekly layout....
I included a blog post that I had written from that week. I just printed it on 8.5 x 11 white cardstock, trimmed it to 6 x 11, added some patterned paper to the top and bottom of the white cardstock, and slipped it into a 6 x 12 page protector.
Two of our kids went to the dentist at the same time, and I knew I wanted to include a lot of journaling about this visit. I added an enlarged photo to an Ali Edward's 8.5 x 11 "Story of Today" overlay template, printed it on my own printer, embellished it with some stamps and ink, and then wrote out some journaling.
I had more journaling than space would allow on the 8.5 x 11 layout, so I then printed out an Ali Edward's 4 x 6 photo overlay on white cardstock and finished the journaling on that. I put that in one of the photo pockets because the photo for that day was already printed on the 8.5 x 11 layout.
I actually ended up printing a bunch of these photo overlays (you can purchase them at Designer Digitals) on white cardstock. I have a stack of them in my little Project Life organizer and I'll regularly use them in place of a 4 x 6 photo when I want to write out journaling somewhere else besides on the PL journaling card. Yay for flexibility and awesome digital elements!
Jackson has been writing some awesome stories at school so I included an example of one on the backside of the 8.5 x 11 layout. The last extra thing I included in this weekly layout was a baseball card page protector filled with extra photos from the week, packaging from things we regularly use (such as a tea bag package and the packaging from some diaper rash cream), Valentine's the kids received, receipts from the grocery store, a Red Cross certification card from a class I took, etc. One last thing to note is that I included a Netflix DVD envelope in one of the 4 x 6 photo pockets. I just folded it in half and slipped it right in. This is definitely one of those life things that I'll want to remember many years from now!

I totally plan on keeping my Project Life 2011 layouts all in one album. For this reason, I will not be adding all these extra things every week! If I included so much extra stuff each week it would definitely take another album to be able to fit all the weekly layouts from 2011. Again, I love the flexibility to be able to add extra elements and life stuff, but I also love the flow that the Project Life weekly layouts provide with just my photos + journaling.
Now that we're more than halfway through March, it is fun to see my PL album filling up! It is already so full of memories, stories, life, and photos. It is awesome to see it coming together!
For this particular week in February, I added a few extra things to the regular weekly layout....
I included a blog post that I had written from that week. I just printed it on 8.5 x 11 white cardstock, trimmed it to 6 x 11, added some patterned paper to the top and bottom of the white cardstock, and slipped it into a 6 x 12 page protector.
Two of our kids went to the dentist at the same time, and I knew I wanted to include a lot of journaling about this visit. I added an enlarged photo to an Ali Edward's 8.5 x 11 "Story of Today" overlay template, printed it on my own printer, embellished it with some stamps and ink, and then wrote out some journaling.
I had more journaling than space would allow on the 8.5 x 11 layout, so I then printed out an Ali Edward's 4 x 6 photo overlay on white cardstock and finished the journaling on that. I put that in one of the photo pockets because the photo for that day was already printed on the 8.5 x 11 layout.
I actually ended up printing a bunch of these photo overlays (you can purchase them at Designer Digitals) on white cardstock. I have a stack of them in my little Project Life organizer and I'll regularly use them in place of a 4 x 6 photo when I want to write out journaling somewhere else besides on the PL journaling card. Yay for flexibility and awesome digital elements!
Jackson has been writing some awesome stories at school so I included an example of one on the backside of the 8.5 x 11 layout. The last extra thing I included in this weekly layout was a baseball card page protector filled with extra photos from the week, packaging from things we regularly use (such as a tea bag package and the packaging from some diaper rash cream), Valentine's the kids received, receipts from the grocery store, a Red Cross certification card from a class I took, etc. One last thing to note is that I included a Netflix DVD envelope in one of the 4 x 6 photo pockets. I just folded it in half and slipped it right in. This is definitely one of those life things that I'll want to remember many years from now!
I totally plan on keeping my Project Life 2011 layouts all in one album. For this reason, I will not be adding all these extra things every week! If I included so much extra stuff each week it would definitely take another album to be able to fit all the weekly layouts from 2011. Again, I love the flexibility to be able to add extra elements and life stuff, but I also love the flow that the Project Life weekly layouts provide with just my photos + journaling.
Now that we're more than halfway through March, it is fun to see my PL album filling up! It is already so full of memories, stories, life, and photos. It is awesome to see it coming together!
Friday, March 4, 2011
photo cards
I loooove making handmade cards. Love it. I love coming up with a design, gathering and cutting all my materials, and mass producing a big batch of cards. Its my creative therapy.
But life is busy. And when the moon and stars are aligned just right and it works out that my free time coincides with my creative juices, then I would much rather be working on a different crafty project than mass producing handmade cards. That is just how it is.....
However a few years ago I learned how to make my own digital photo cards. This technique combines my photography with my digi scrappin' skills. Neither of those skills are stellar, but I do enjoy photography and I know a little about Photoshop! Making photo cards is a huge time saver for me! All you do is take your photos, edit them, add a little text to the photo in Photoshop, print, and done! Becky Higgins does an excellent job of explaining these steps further on her blog.
Here are some examples of a few photo invitations I've done and Zoe's birth announcement.
For Jack's 7th birthday party in a few weeks. I added a digital photo overly in addition to the text in this one.
Macy's 3rd birthday party invitation. I think the hardest part of making digital photo cards is picking out the fonts. I think this handwriting font looks pretty similar to my own handwriting, which is why I downloaded it. I use it often!
Zoe's 1st birthday party invitation. I added some dingbat flowers to this one.
And Zoe's birth announcement.
Fun. Easy. Cute. And super quick!
But life is busy. And when the moon and stars are aligned just right and it works out that my free time coincides with my creative juices, then I would much rather be working on a different crafty project than mass producing handmade cards. That is just how it is.....
However a few years ago I learned how to make my own digital photo cards. This technique combines my photography with my digi scrappin' skills. Neither of those skills are stellar, but I do enjoy photography and I know a little about Photoshop! Making photo cards is a huge time saver for me! All you do is take your photos, edit them, add a little text to the photo in Photoshop, print, and done! Becky Higgins does an excellent job of explaining these steps further on her blog.
Here are some examples of a few photo invitations I've done and Zoe's birth announcement.
For Jack's 7th birthday party in a few weeks. I added a digital photo overly in addition to the text in this one.
Macy's 3rd birthday party invitation. I think the hardest part of making digital photo cards is picking out the fonts. I think this handwriting font looks pretty similar to my own handwriting, which is why I downloaded it. I use it often!
Zoe's 1st birthday party invitation. I added some dingbat flowers to this one.
And Zoe's birth announcement.
Fun. Easy. Cute. And super quick!
Thursday, February 3, 2011
scripture memory challenge
The awesome Women's Ministry at my church has challenged us to memorize two Scriptures each month in 2011. Many women in my church have taken on this challenge, including myself, and its been pretty cool to see everyone posting which verses they will memorize. Because I am a visual person, the only way I will actually remember to study and memorize my verses is if they are in plain view for me to see. Matt found this little photo flip album at Meijer and this is how I plan to keep my Bible memory verses in plain view:
And, where do I plan to keep it, you might ask? Well, in the kitchen of course. Not because I'm eating all the time....but because preparing, serving, and cleaning up meals is a HUGE part of my day as a Mama and daycare provider. So, my Scriptures will be in plain view for sure. Right next to my recipe box and blender. AND, I might even get a little crazy and move it around the kitchen here and there.....
What I LOVE about this flip photo album is that I'll have all my verses together and I can flip to them whenever I want. And, of course, you know I had to get a little creative and make each verse a little pretty ;)
I had another one of those "aha!" moments tonight when it comes to my Project Life album. I won this cute little "thirtyone" organizer from my friend Angie and I have decided to use it as my "Project Life all-in-one" organizer. I stuck everything in here that I'll use for PL and I can easily grab it to take it with me when I'm working on my PL album. Besides all the kit contents (journaling cards, date stickers, etc) that come with the PL kit, I also stuck my corner rounder, a small adhesive applicator, photo overlays, a pen, post-it sticky notes, and random things I want to include in my PL album (receipts, tags, small memorabilia, etc). I'm good to go!
In other news, we're on day 3 of NO SCHOOL here. Lots of snow + wind + ice + COLD = cancelled school. Its been kinda fun to be stuck at home with not a lot to do, BUT we're also ready to get back in the swing of things. Its amazing how little we accomplished these past 3 days! You would think we would have been able to check off a bunch of things from our to-do list. Well, we actually don't really have much on our to-do list at all.....so we did some laundry and I did a few creative things. But mostly we just snuggled up in the gigantic multi-couch fort (assembled by my Tetris-loving husband, Matt), played with the kids, and enjoyed the relaxation. We stayed at home for 2 days while most places were shut down and the weather was super crummy. And then today we were able to venture out. Jack and I went to the library to replenish his "Captain Underpants" books, Matt went to the store, and the kids went to Grandma's house for a few hours for a much-needed Grandma night. Matt managed to dig a little path out so we could go get the mail yesterday...
Good times.
And, where do I plan to keep it, you might ask? Well, in the kitchen of course. Not because I'm eating all the time....but because preparing, serving, and cleaning up meals is a HUGE part of my day as a Mama and daycare provider. So, my Scriptures will be in plain view for sure. Right next to my recipe box and blender. AND, I might even get a little crazy and move it around the kitchen here and there.....
What I LOVE about this flip photo album is that I'll have all my verses together and I can flip to them whenever I want. And, of course, you know I had to get a little creative and make each verse a little pretty ;)
I had another one of those "aha!" moments tonight when it comes to my Project Life album. I won this cute little "thirtyone" organizer from my friend Angie and I have decided to use it as my "Project Life all-in-one" organizer. I stuck everything in here that I'll use for PL and I can easily grab it to take it with me when I'm working on my PL album. Besides all the kit contents (journaling cards, date stickers, etc) that come with the PL kit, I also stuck my corner rounder, a small adhesive applicator, photo overlays, a pen, post-it sticky notes, and random things I want to include in my PL album (receipts, tags, small memorabilia, etc). I'm good to go!
In other news, we're on day 3 of NO SCHOOL here. Lots of snow + wind + ice + COLD = cancelled school. Its been kinda fun to be stuck at home with not a lot to do, BUT we're also ready to get back in the swing of things. Its amazing how little we accomplished these past 3 days! You would think we would have been able to check off a bunch of things from our to-do list. Well, we actually don't really have much on our to-do list at all.....so we did some laundry and I did a few creative things. But mostly we just snuggled up in the gigantic multi-couch fort (assembled by my Tetris-loving husband, Matt), played with the kids, and enjoyed the relaxation. We stayed at home for 2 days while most places were shut down and the weather was super crummy. And then today we were able to venture out. Jack and I went to the library to replenish his "Captain Underpants" books, Matt went to the store, and the kids went to Grandma's house for a few hours for a much-needed Grandma night. Matt managed to dig a little path out so we could go get the mail yesterday...
Good times.
Tuesday, January 25, 2011
my cheeks still hurt from so much laughter
The 2011 Project Life Kick Off certainly did not disappoint! Lots of creativity, lots of inspiration, lots of laughs, LOTS of excitement about Project Life, lots of "ahha!" moments, and lots of productivity. We had a fantastic time celebrating the beginning of Project Life for this year. I can't wait to get together again next month! Here is everyone with our Project Life albums.
There is a nice mixture of different Project Life editions. Some from the 2010 edition, the 2011 Turquoise edition, and the 2011 Amber edition. (A couple of ladies in the photo are waiting to order their kits when Amazon has more in stock, so they were celebrating with us at the Kick Off, but didn't have their albums quite yet...) Some of us have scrapbooked for years and others have never scrapbooked. I am the only one out of this group who has done a Project Life album before, so this is a new scrapbooking concept for most everyone in our Project Life group. Some of us had been working on our 2011 Project Life albums since January 1 and some of us were scared to even open up the Project Life box! It was awesome to get everyone's albums set up and ready to go, start adding their photos, and to see each person "get" how to complete their albums this year. I so believe in this scrapbook concept. Especially for those who think they are creatively challenged, don't have time to scrapbook, or are just intimidated by the word 'scrapbooking'. I'm SO GLAD this group of women has committed to document the everyday stories and lives of their families for 2011. I think they will whole-heartedly treasure this album once it is completed. And, hopefully, have a little fun in the process!
Here are some views of my first two weeks of layouts from my PL album this year.
Week 1, right side of the layout. Photos along the top and bottom, journaling cards in the middle. This is how every layout will look like throughout the year.
Week 2. I took a bunch of photos that I wanted to include in my album this week. So, in addition to the photo per day in the page protectors that came with the PL kit, I added a 12 x 12 divided page protector right in the middle of this week's layout. This page protector is divided up into 4 x 4 inch squares. Its one of my favorite page protector styles! I included a few extra photos from our everyday lives from this week and also a few other things. A business card from the doctor's office, a note that Matt wrote to Jack and put in his lunch one day that week, part of a birthday card I made for Matt, and some extra fun patterned paper with a little extra journaling. I won't add extra pages EVERY week, but loved filling in this week's layout with some extra goodies.
Sometimes my journaling is just a simple story from something that happened that day, like this:
And sometimes my journaling is a list of things, like this:
There is a nice mixture of different Project Life editions. Some from the 2010 edition, the 2011 Turquoise edition, and the 2011 Amber edition. (A couple of ladies in the photo are waiting to order their kits when Amazon has more in stock, so they were celebrating with us at the Kick Off, but didn't have their albums quite yet...) Some of us have scrapbooked for years and others have never scrapbooked. I am the only one out of this group who has done a Project Life album before, so this is a new scrapbooking concept for most everyone in our Project Life group. Some of us had been working on our 2011 Project Life albums since January 1 and some of us were scared to even open up the Project Life box! It was awesome to get everyone's albums set up and ready to go, start adding their photos, and to see each person "get" how to complete their albums this year. I so believe in this scrapbook concept. Especially for those who think they are creatively challenged, don't have time to scrapbook, or are just intimidated by the word 'scrapbooking'. I'm SO GLAD this group of women has committed to document the everyday stories and lives of their families for 2011. I think they will whole-heartedly treasure this album once it is completed. And, hopefully, have a little fun in the process!
Here are some views of my first two weeks of layouts from my PL album this year.
Week 1, right side of the layout. Photos along the top and bottom, journaling cards in the middle. This is how every layout will look like throughout the year.
Week 2. I took a bunch of photos that I wanted to include in my album this week. So, in addition to the photo per day in the page protectors that came with the PL kit, I added a 12 x 12 divided page protector right in the middle of this week's layout. This page protector is divided up into 4 x 4 inch squares. Its one of my favorite page protector styles! I included a few extra photos from our everyday lives from this week and also a few other things. A business card from the doctor's office, a note that Matt wrote to Jack and put in his lunch one day that week, part of a birthday card I made for Matt, and some extra fun patterned paper with a little extra journaling. I won't add extra pages EVERY week, but loved filling in this week's layout with some extra goodies.
Sometimes my journaling is just a simple story from something that happened that day, like this:
And sometimes my journaling is a list of things, like this:
Other days my journaling is just a quote from something the kids said that day, a to-do list, or just documenting what we did that particular day. I'll also be sure to add receipts, tags from clothes, artwork by the kids, etc, throughout the year.
This project can be tailored to whatever works for you! And its oh-so-fun!
Friday, January 14, 2011
how I scrapbook, part two
Project Life. Ahhhhh. There is a tiny explosion inside my heart every time I think about my Project Life albums. I just started my second year of doing this project and I must say, I LOVE it. Its so simple. So clean. So easy to keep up with. And, as an added little bounus for this year, I have about a dozen of my friends doing their own Project Life albums at the same time. We'll be getting together on a monthly basis and sharing our albums and getting inspiration from each other. I know I will treasure this little community of Project Lifers.
Project Life is all about capturing the everyday lives of my entire family. I sincerely wish I had a place in my house where I could keep my PL album out and in view so my family could help participate in the making of it. The fabulous Ali Edwards has her album smack on the counter in her kitchen (she's a brave woman...) so its always at her fingertips. Our kitchen has waaaay too many little grimey hands for me to pull this off, but I do love the concept!
The way I'm tackling Project Life is to do a "photo per day" approach. I'm taking at least one photo per day, for the most part. For me the concept of PL is to catch a glimpse of our daily lives when looking through this album, so I want to add everyday photos that are significant to me and my family. If that means using two photos from one day and no photos from another day, then that is fine. Everyday significance. Telling our story. Including the details. (Not just taking photos of people!) I haven't printed any photos out from this year to add to my album, but once I do, I will be sure to upload what a weekly layout looks like.
Here are a few examples of my daily photos I'll be using from the past two weeks:
My husbands Nerf collection. He's slightly obsessed....
A stack of some of Jack's favorite books:
iPod Touch (looooove):
Zoe coloring with Daddy:
Ingredients for my homemade laundry detergent:
Macy and Jackson sledding:
Along side my Project Life album, I will also do my "regular" scrapbooking. On these layouts I'll delve a little deeper into each of our lives. This is also where my more creative side busts out as well. Some recent favorite layouts:
Layout about Matt and I's favorite things to do on date nights. Don't forget to include yourself and your likes/dislikes on your pages! And be sure to utilize your camera's self-timer.
Here is an example of my method for scrapbooking school memorabilia and such. Let me explain. I mostly do 12 x 12 inch layouts. But I also love mixing and matching differnet types of page protectors (notice the baseball card page protector below) and different page sizes as well. I scrapbook school stuff (report cards, examples of homework, artwork, teacher newsletters, backpack "gems", etc) right along with my kids' other scrapbook pages. That way, down the road, everything is all together. I put all the kids' paper school memorabilia (report cards, homework, flat artwork, etc) in 8.5 x 11 page protectors and put them right in between the other scrapbook pages, chronologically. For large artwork that I want to keep but is too large for the scrapbook, I will scan it and include it in their albums. Of course there are some things I will keep the originals of, but mostly I like things neat and simple and I don't want a lot of extra stuff around. At the end of each school day, I empty out Jack's back pack and decide what to keep and what to recycle. Most of the time his papers get recycled. I just don't see the point in keeping EVERY SINGLE PAPER that comes home. But if it is something he is definitely proud of or that really sums up what his school year is about, then I'll stick it in the scrapbook. This system works well for me and keeps things nice and organized throughout the school year!

Project Life is all about capturing the everyday lives of my entire family. I sincerely wish I had a place in my house where I could keep my PL album out and in view so my family could help participate in the making of it. The fabulous Ali Edwards has her album smack on the counter in her kitchen (she's a brave woman...) so its always at her fingertips. Our kitchen has waaaay too many little grimey hands for me to pull this off, but I do love the concept!
The way I'm tackling Project Life is to do a "photo per day" approach. I'm taking at least one photo per day, for the most part. For me the concept of PL is to catch a glimpse of our daily lives when looking through this album, so I want to add everyday photos that are significant to me and my family. If that means using two photos from one day and no photos from another day, then that is fine. Everyday significance. Telling our story. Including the details. (Not just taking photos of people!) I haven't printed any photos out from this year to add to my album, but once I do, I will be sure to upload what a weekly layout looks like.
Here are a few examples of my daily photos I'll be using from the past two weeks:
My husbands Nerf collection. He's slightly obsessed....
A stack of some of Jack's favorite books:
iPod Touch (looooove):
Zoe coloring with Daddy:
Ingredients for my homemade laundry detergent:
Macy and Jackson sledding:
Along side my Project Life album, I will also do my "regular" scrapbooking. On these layouts I'll delve a little deeper into each of our lives. This is also where my more creative side busts out as well. Some recent favorite layouts:
Me and Macy and a little note I wrote to her about how much I love her age right now.
Here is an example of my method for scrapbooking school memorabilia and such. Let me explain. I mostly do 12 x 12 inch layouts. But I also love mixing and matching differnet types of page protectors (notice the baseball card page protector below) and different page sizes as well. I scrapbook school stuff (report cards, examples of homework, artwork, teacher newsletters, backpack "gems", etc) right along with my kids' other scrapbook pages. That way, down the road, everything is all together. I put all the kids' paper school memorabilia (report cards, homework, flat artwork, etc) in 8.5 x 11 page protectors and put them right in between the other scrapbook pages, chronologically. For large artwork that I want to keep but is too large for the scrapbook, I will scan it and include it in their albums. Of course there are some things I will keep the originals of, but mostly I like things neat and simple and I don't want a lot of extra stuff around. At the end of each school day, I empty out Jack's back pack and decide what to keep and what to recycle. Most of the time his papers get recycled. I just don't see the point in keeping EVERY SINGLE PAPER that comes home. But if it is something he is definitely proud of or that really sums up what his school year is about, then I'll stick it in the scrapbook. This system works well for me and keeps things nice and organized throughout the school year!
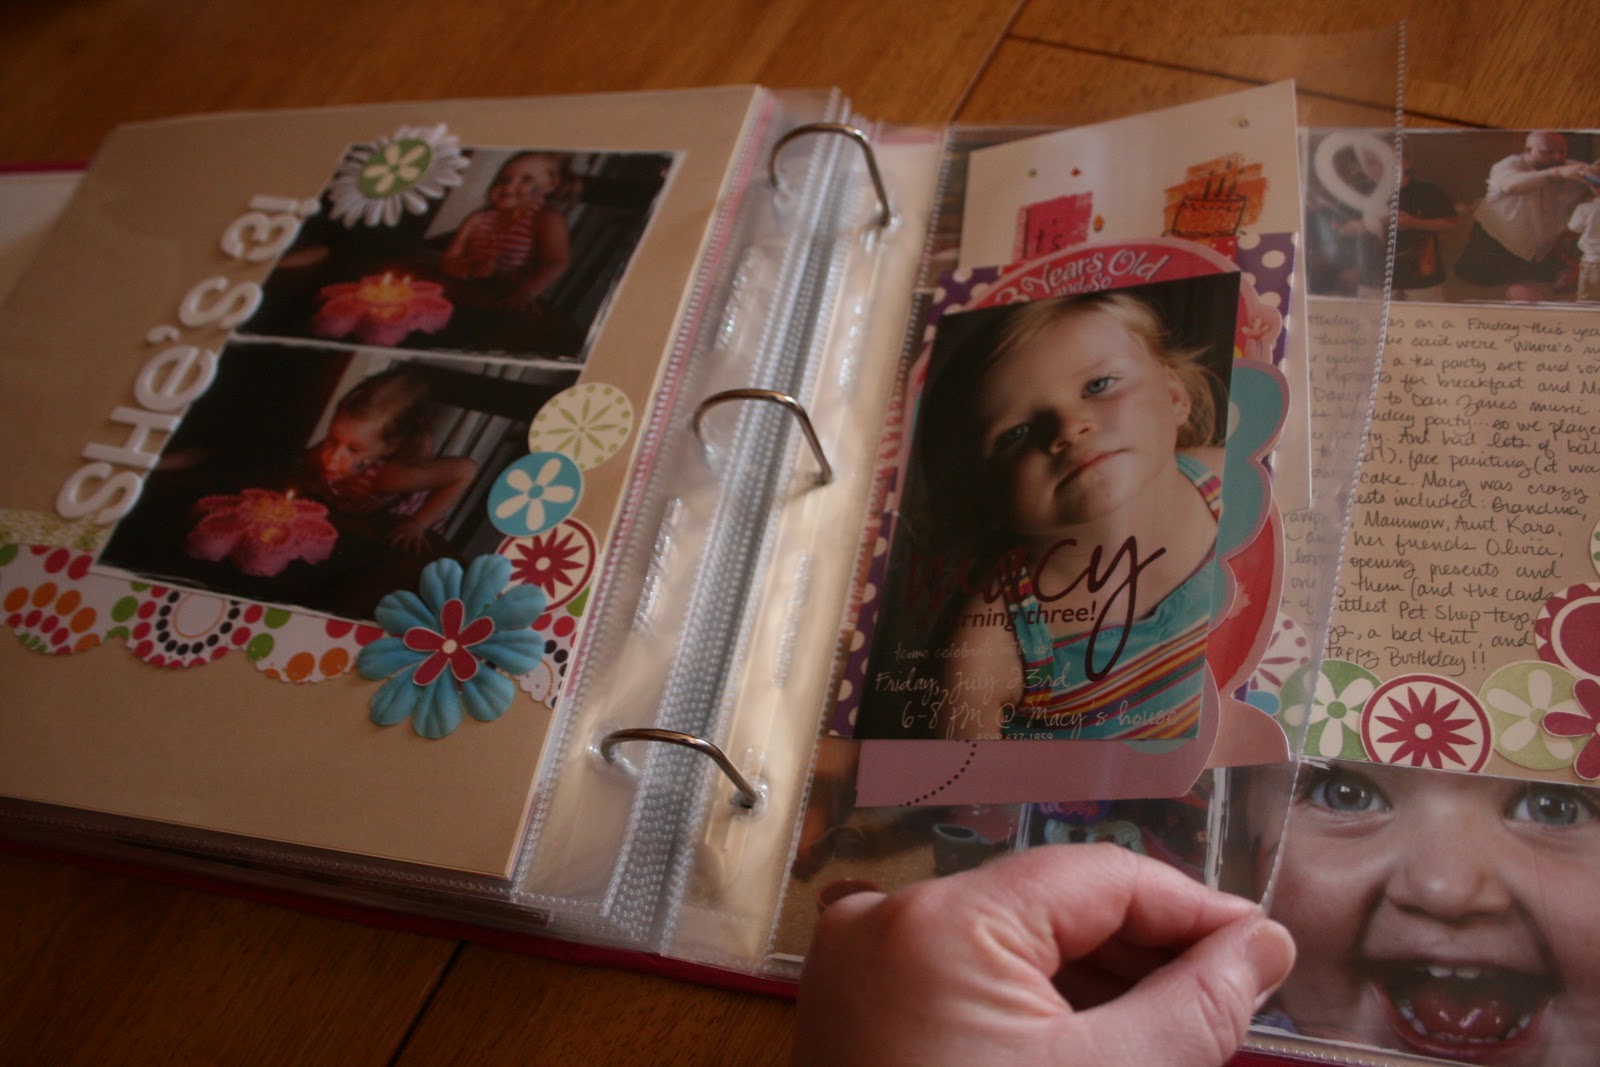
Another example of how I'll use different sized page protectors in my albums. This is a 2-page layout about Macy's 3rd birthday. In the middle, I included a 6 x 12 inch page protector and slipped birthday party memorabilia (cards from her friends, her party invitation, etc) in the page protector.
And now I'm feeling a burst of creativity, so I need to go make something....
Subscribe to:
Posts (Atom)